A good friend of mine had a Kindle that refused to charge easily like a good piece of hardware. You could get the charge LED to come on for a second or so if you wiggled the mini USB plug, but otherwise it was a crapshoot to get the unit to charge for any length of time.
Being quite a hassle, she asked me if I could fix it and gave me one of those pretty smiles that I’m such a sucker for.
Enter the Kindle.
The first 5 minutes was me looking around the perimiter trying to find any hidden screws that might hold it together and experimentally wedging my fingernails under the edge looking for pop latches. Once I got one edge to come up, I went around the entire perimeter carefully popping the back cover off.
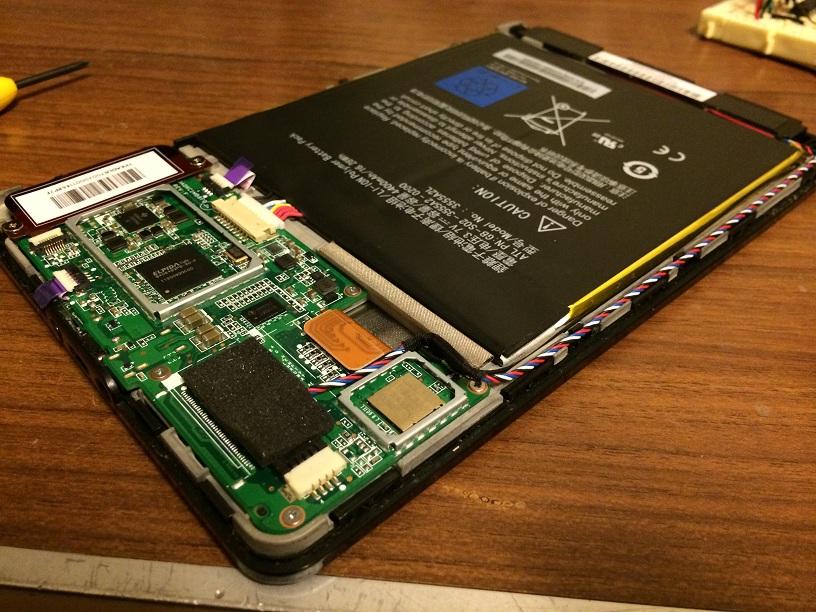
Sexy
The USB receptical is located on the underside of the green PCB that makes up the brains of this little unit. I was impressed at the size of the battery on here, but my job was under the PCB. Eight little phillips screws later and some care to remove the plugs and ribbon cables gave me my first look at the connections.

Here is the offending USB port.

Some little reflow unit was a bad boy.
All five of the pins for the USB receptacle had broken their solder joints. This actually happens somewhat commonly in electronics. The amount of heat needed to reflow the solder paste for the tiny components is small compared to the thermal mass of something as big as a plug. I’ve seen a lot of times where the ground pins never get properly soldered to the board and the receptacle is left wobbling until it breaks its own connections. In this case every single pin had come loose. Looking closely, I think the problem might also be that there was not enough solder paste applied to the pads before the component was set on top of it and the solder just couldn’t flow properly as a result. Either way, I found the issue and I knew how to fix it.
The pins were too close together to easily solder separately. I tried. Unfortunately the only tip on my soldering iron that would decently fit onto a pin was too small to carry enough heat to the part to make a good solder joint. I used a trick originally taught to me by Dave Jones of the EEVblog and just soldered all of them at once. This allowed me to use a larger tip to carry enough heat down to the pins and ensure that each one is soldered well and good. There was just one problem.

The Horror!
Now don’t worry. There is this wonderful material called solder wick, and it pretty much does what you think it does. I applied a little amount to the solder blob I just made and put my soldering iron back to the part. Solder wick works by pulling solder into the fine braids of wire through surface tension and capillary action. The beauty of using it in this case was that those same forces also existed between the pads of the PCB and the pins that were sitting on top of them. The result was that most of the solder above the pins was wicked away while the solder under the pins (i.e. the good solder) remained.
 Now in the interest of full disclosure, I did go back and touch up the pins individually after the solder wick did its job and before that last picture was taken. Once each pin had been properly wetted with solder it responded to my overly large iron tip well enough to carefully confirm that it was free of solder bridges between the pins.
I cleaned off my excess flux (the secret to good soldering) and did another visual check for solder bridges. I reassembled the kindle and confirmed it indeed worked and couldn’t even interrupt charging when I tried.
Success.
And I got another pretty smile too.
